When you buy one of the best MacBooks, you know that Apple has baked in a bunch of great trackpad gestures to help you navigate macOS quickly and easily. It’s one of the best ways the company’s hardware and software seamlessly work hand-in-hand.
There are a lot of macOS gestures, but there are a few that every Mac user should know, which we’ve rounded up here. Some you might have heard of, while others could be completely new to you. Either way, here’s our take on the best macOS trackpad gestures and how you use them.
How to open Launchpad
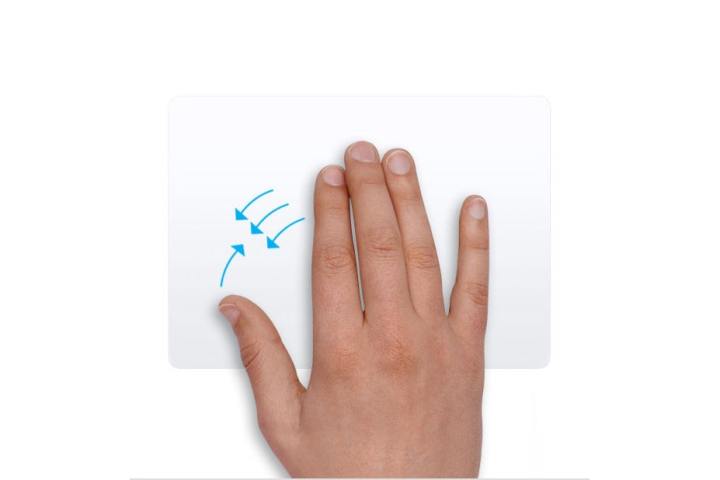
Whether you want to gain a quick overview of your installed Mac apps or just launch something quickly, this gesture is invaluable. It opens the Launchpad app, which shows all of your apps on a grid for swift access.
To perform it, just move your thumb and first three fingers together on your trackpad. To close Launchpad, simply move your fingers and thumb apart.
How to show your desktop
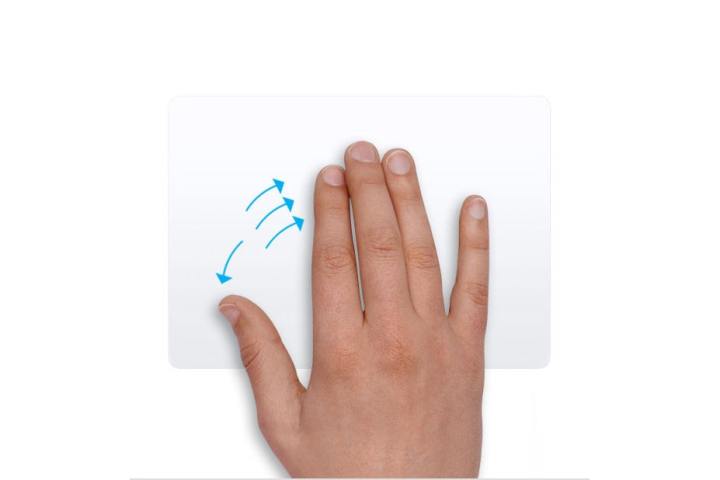
You can also do the reverse of the Launchpad gesture above. In macOS, spread your thumb and first three fingers apart and your open apps will be cleared out of the way, revealing your desktop.
This is a handy way to find files and folders on your desktop that would otherwise be obscured by an app window. It’s also a great way to drag a file from your desktop into an open app. Just move your fingers and thumb apart, then click and drag the file onto the app’s icon in the Dock until it starts flashing. The app will return and you’ll be able to drop the file in place.
How to drag files (the better way)

If you’ve ever tried to drag a file from one side of your screen to the other using just your trackpad, you’ll know this can be tricky, especially if you reach the edge of your trackpad. Luckily, there’s a better way to do it.
Open the Settings app and select Accessibility > Pointer Control > Trackpad Options. Enable Use trackpad for dragging and choose Three-Finger Drag from the dropdown menu.
This lets you move a file by positioning the macOS pointer over it and moving it using three fingers at once, at which point the pointer ‘latches on’ and starts moving the file. The best part of this is you can let go of the trackpad, and then do another three-finger drag to move the file again. That means you can quickly do multiple swipes and move the file around without having to keep your fingers on the trackpad, which isn’t always easy.
How to Force click

Apple’s trackpads let you ‘Force click’ (or press a little harder) in order to get extra functionality. That works really well and is definitely worth incorporating into your daily routine.
For example, if you do a single-finger Force click on a word in Safari, you’ll see a pop-up window with a definition of the word. At the bottom of the window are other categories with extra info, such as relevant films, map data, Siri knowledge, and more.
This works on what Apple calls “data detectors.” These can be addresses, phone numbers, email addresses, web links — anything you can take subsequent action on in macOS. Force-click a link, for example, and you get a pop-up preview of the web page. The many different uses of this gesture make it a very useful one to have to hand.
How to open Mission Control
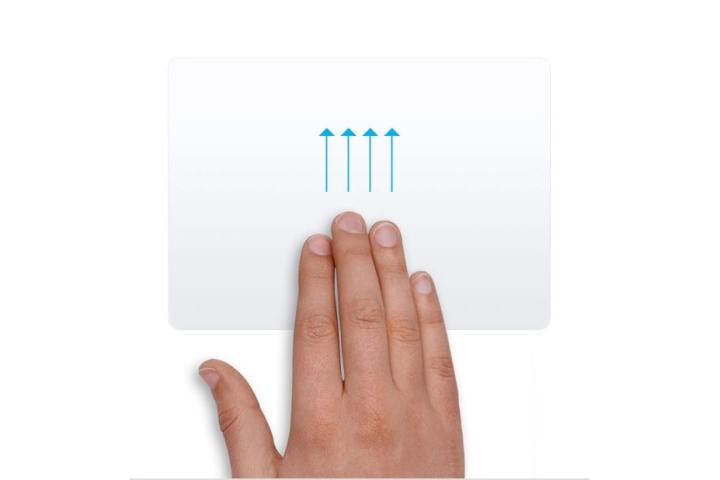
Sometimes, you’ll find your macOS screen crowded with a bunch of apps and windows. That can make it hard to locate an app you used a while ago without minimizing every window to the Dock, one by one. However, a quick gesture solves this problem.
Swipe up on your trackpad with four fingers and you’ll open Mission Control, which shows every window that’s currently open, letting you click the one you’re after. This gesture also reveals any virtual desktops you have open (more on that shortly).
How to hide all other apps

While swiping up with four fingers shows all of your open apps, sometimes you just want to focus on the app you’re using right now. To do that, it’s a four-finger swipe down. This gesture (called App Exposé) shows any open windows for the current app next to each other, with a list of recent documents running along the bottom of your screen.
To run this gesture, you need to enable App Exposé. Open the Settings app, then select Trackpad > More Gestures. Next to App Exposé, choose Swipe Down with Four Fingers from the dropdown menu (there’s also an option for swiping down with three fingers if you prefer).
How to switch desktops
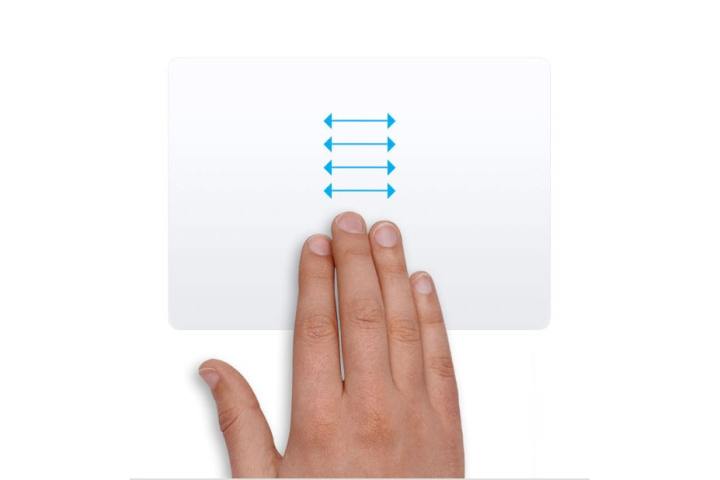
Mission Control is a great way to manage multiple desktops, and you can access it by swiping up with four fingers. But there’s actually a quicker way to move through your desktops: swipe left or right with four fingers on your trackpad.
Note that if you have a number of apps open in full-screen mode, this same four-finger drag will incorporate them into your swipes through your desktops. For example, you might have Desktop 1, then a full-screen app, then Desktop 2, all linked by four-finger swipes.
Editors' Recommendations
- Best Apple deals: Save on AirPods, Apple Watch, iPad, MacBook
- The easy way to choose between the Mac Studio and Mac mini
- Have the M3 MacBook Pros made the Mac Studio irrelevant?
- This is one of my favorite Windows laptops. But can it beat the MacBook Air?
- The MacBook Pro we all want is still many years away